Key Takeaways
- Differential pressure is the single most important indicator of baghouse health. Recording it daily — starting from the day new bags are installed — creates a baseline that makes every future problem diagnosable. Normal operating range for most pulse-jet systems is 3–6 inches of water column (750–1,500 Pa).
- Hopper overfill is the most common preventable cause of accelerated filter bag wear. Hoppers are designed for dust transition, not storage — if the discharge system fails and dust accumulates to the bag level, pulse-jet cleaning re-entrains material into the airstream and abrades bag bottoms from the inside.
- Compressed air quality directly affects pulse-jet cleaning effectiveness and filter bag life. Moisture, oil, and contaminants in the compressed air supply degrade pulse valve diaphragms, cause filter bag blinding, and reduce cleaning efficiency. Air dryers and moisture traps should be inspected monthly.
- Most baghouse problems present as gradual trends, not sudden failures. A slow rise in baseline differential pressure, a gradual increase in outlet opacity, or a progressively shorter interval between cleaning cycles are all early indicators that something is changing — and are all correctable if caught early.
- Annual structural inspection — welds, joints, flanges, housing integrity, and tube sheet condition — identifies corrosion and fatigue damage before it becomes a leak path or a safety risk.
- Fluorescent powder leak testing once per year, or after any bag replacement, provides the most reliable verification of system sealing integrity and catches leak paths that visual inspection consistently misses.
A baghouse dust collector· is one of those systems that works reliably enough, for long enough, that it’s easy to take it for granted — until something goes wrong. And when something goes wrong with a baghouse, it tends to show up as one of three things: an emission compliance failure, an unplanned production shutdown, or a maintenance bill that’s significantly larger than it needed to be.
The frustrating part is that most baghouse failures are preventable. Not with expensive upgrades or specialized equipment, but with a structured maintenance program that monitors the right parameters, inspects the right components at the right intervals, and addresses the gradual trends that precede every major failure. The baghouse that gets a daily differential pressure reading, a weekly hopper check, and a monthly cleaning system inspection is the one that runs for years without a significant problem. The one that gets looked at only when something breaks is the one that breaks expensively.
This article is a complete maintenance guide — from the daily tasks that take five minutes to the annual inspections that prevent catastrophic failures. It’s written for plant engineers, maintenance supervisors, and operations teams who want to understand not just what to check, but why each check matters and what the readings actually mean.
Understanding Differential Pressure: The Single Most Important Number in Baghouse Operation
If you only monitor one parameter on your baghouse, make it differential pressure. Measured across the filter bags (between the dirty-air inlet and the clean-air outlet), differential pressure tells you more about the health of your system than any other single measurement.
What the Numbers Mean
A new set of filter bags in a clean system will show a low differential pressure — typically below 1 inch of water column (250 Pa). As the bags develop a dust cake during the first days and weeks of operation, the differential pressure rises and eventually reaches an equilibrium — the steady-state operating pressure where the dust cake that forms between cleaning cycles is balanced by the dust cake removed during each cleaning pulse.
For most pulse-jet baghouse systems, normal operating differential pressure falls in the range of 3 to 6 inches of water column (750 to 1,500 Pa). The exact number depends on the filter media type, fabric weight, air-to-cloth ratio, dust characteristics, and cleaning system settings.
What matters more than the absolute number is the trend. A stable differential pressure that sits consistently at 4 inches over weeks and months tells you the system is in equilibrium. A differential pressure that was 4 inches last month and is now 5.5 inches — with no process change — tells you something has changed in the system that needs investigation.
What Rising Differential Pressure Indicates
A gradual upward trend in baseline differential pressure typically points to one of four root causes:
Filter blinding. The filter bags are losing permeability because fine particles are migrating into the depth of the felt structure and can’t be removed by cleaning. This is common in applications with very fine dust, high moisture content, or where the cleaning system is underperforming.
Cleaning system degradation. Pulse valves with worn diaphragms, insufficient compressed air pressure, or timer/sequencer malfunctions reduce cleaning effectiveness, allowing residual dust cake to accumulate between cycles.
Increased dust loading. A process change upstream — higher production rate, different raw material, or a change in material handling — may have increased the dust load entering the baghouse beyond the original design capacity.
Air leaks into the system. Structural leaks that allow ambient air to enter the dirty-air side increase the total gas volume the filter bags need to handle, raising the effective air-to-cloth ratio and the differential pressure. For more on how differential pressure measurement works as a diagnostic tool, see our article on how a Magnahelic gauge measures baghouse performance.
What Falling Differential Pressure Indicates
A sudden drop in differential pressure is usually bad news — it typically means a bag has failed, a seam has opened, a snap band has come unseated, or a structural breach has developed somewhere in the system. The lower resistance means air is taking a shortcut through the leak path rather than through the filter media. If you see a sudden pressure drop accompanied by visible stack emissions, you have an active leak that needs immediate attention.
The Maintenance Schedule: What to Check and When
Daily Tasks (5–10 Minutes)
These are the minimum daily observations that every baghouse operator should be recording:
Record differential pressure. Read the Magnahelic gauge or digital pressure transmitter and log the value. Do this at the same point in the cleaning cycle each day (either just before or just after a cleaning sequence) for consistency. Over time, this log becomes the most valuable diagnostic data set you have.
Visual stack check. Look at the exhaust stack. Any visible particulate emission — a puff, a haze, a plume — indicates a leak in the system. In a properly operating baghouse, the exhaust should be visually clean.
Hopper level check. Verify that the hopper discharge system (rotary airlock, screw conveyor, double dump valve) is operating and that dust is being removed. A hopper that’s accumulating dust is a problem waiting to happen — when dust reaches the bag level, cleaning pulses re-entrain it into the airstream and abrade bag bottoms from the inside.
Compressed air pressure. Check the compressed air supply pressure at the pulse-jet header. It should be at the system’s design pressure — typically 80 to 100 psi (5.5 to 7 bar) for standard pulse-jet systems, lower for low-pressure pulse systems. A drop in supply pressure reduces cleaning effectiveness.
Abnormal sounds. Listen to the pulse-jet cleaning sequence. Each valve should fire with a sharp, consistent pop. Misfiring valves (weak or absent pulse), grinding noises, or irregular cycling indicate valve or timer problems.
Weekly Tasks (30–60 Minutes)
Cleaning system function check. Observe a complete cleaning cycle. Confirm that every pulse valve fires in sequence, that no valves are stuck open or closed, and that the cleaning timer or controller is cycling correctly. A single stuck valve means one row of bags isn’t being cleaned — and those bags will blind progressively until they’re identified.
Hopper discharge system inspection. Check rotary airlock seals, screw conveyor operation, and discharge point for bridging or buildup. Dust bridging in the hopper throat is a common problem in applications with hygroscopic or cohesive dust — it blocks discharge without triggering any pressure or level alarm.
Compressed air moisture check. Drain any accumulated moisture from the compressed air receiver tank and the pulse-jet header drain. Moisture in the pulse-jet air supply is one of the most common causes of valve diaphragm failure and filter bag blinding in humid climates. If moisture is a recurring problem, the air dryer system needs inspection.
Door seal and gasket check. Walk the outside of the baghouse and check all access doors, inspection ports, and flanged connections for visible dust leakage or air ingress.
Monthly Tasks (2–4 Hours)
Blow out differential pressure sensing lines. Disconnect one line at a time from the Magnahelic gauge and blow through it with 20–25 psi compressed air back toward the baghouse. Dust accumulation in these lines gives false pressure readings — the most common cause of operators making bad decisions based on good-looking data that’s actually wrong.
Inspect pulse valve diaphragms. Remove and inspect at least a representative sample of diaphragm valves for wear, cracking, or contamination. A worn diaphragm reduces pulse force and cleaning effectiveness before it fails completely. Replace any diaphragm that shows visible wear.
Check compressed air dryer and moisture traps. Verify that air dryers are functioning and that automatic condensate drains are operating. In humid environments, this check alone prevents more bag blinding issues than any other single maintenance activity.
Inlet temperature monitoring. Confirm that the baghouse inlet temperature is within the rated range for your filter media. Temperature exceedances — even brief ones during startup or process upsets — cause cumulative thermal damage to filter bags. If you’re running PPS filter bags rated to 160°C continuous and your inlet is regularly touching 175°C during startup, the bags are accumulating thermal damage that will shorten their service life.
Quarterly Tasks (Half Day)
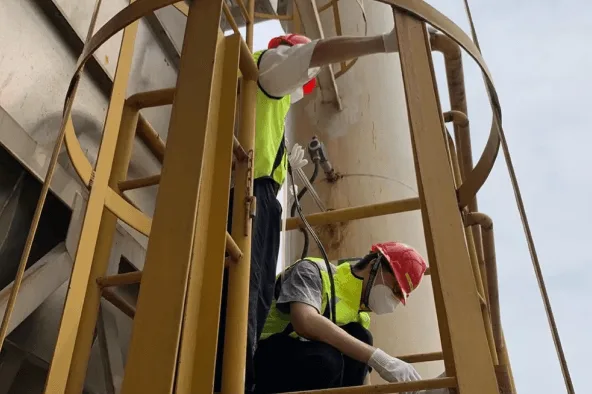
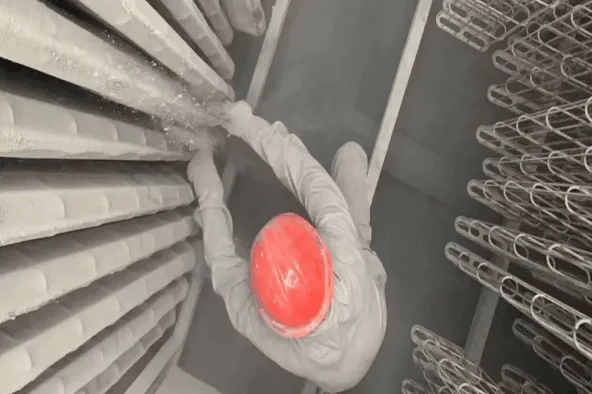
Internal bag inspection (sample basis). Open one or two compartments and visually inspect bags and cages. Look for dust accumulation patterns on the clean-air side that indicate leaking bags, cage wire abrasion marks on bag surfaces, snap band condition, and any evidence of chemical attack (discoloration, fiber degradation, stiffness changes).
Ductwork inspection. Check inlet and outlet ductwork for dust accumulation, corrosion, and abrasion wear. Dust buildup in ductwork — especially at bends, transitions, and horizontal runs — reduces airflow velocity and can eventually block sections of the system.
Fan inspection. Check fan bearings for vibration and temperature, inspect fan blades for dust buildup and erosion, and verify that fan performance (airflow and pressure) matches design expectations. A dirty fan or worn bearings reduce system airflow, which reduces capture velocity at the dust pickup points.
Annual Tasks (Full Day)
Full structural inspection. Inspect all welds, joints, flanges, housing panels, and structural support members for corrosion, fatigue cracking, and deterioration. Check hopper walls for wear spots and thinning. Look for holes or light leaks in the collector housing. Repair any structural defects before they become leak paths or safety hazards.
Tube sheet inspection. With bags removed (during a bag replacement or during a dedicated inspection shutdown), inspect the tube sheet for corrosion, warping, and snap band seat condition. Tube sheet deterioration creates seal problems that can’t be corrected by bag replacement alone.
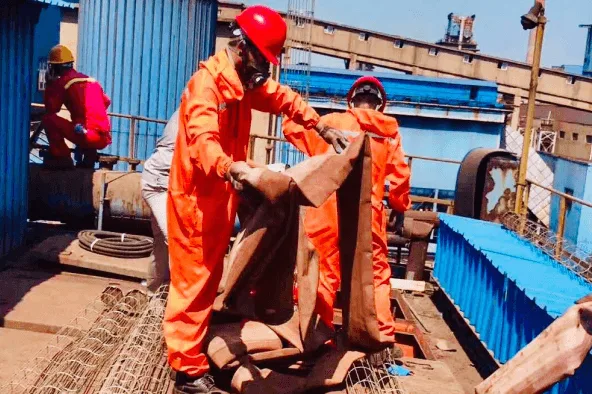
Full filter bag inspection. Inspect all bags for wear, chemical degradation, and mechanical damage. Conduct a fluorescent powder leak test to verify system sealing integrity — this is the most reliable annual verification method and consistently identifies leak paths that visual inspection misses.
Cleaning system overhaul. Replace all pulse valve diaphragms on a preventive basis (rather than waiting for failure), inspect the pulse-jet header and manifold for leaks, verify solenoid valve operation, and confirm timer/controller settings.
For additional detail on replacement parts that should be maintained on a preventive basis, our article on top 5 essential dust collector replacement parts to reduce downtime covers the components with the highest impact.
Common Baghouse Faults: Diagnosis and Corrective Action
Fault 1: Rising Differential Pressure Despite Normal Cleaning
Symptoms: Baseline differential pressure trends upward over weeks or months. Cleaning cycles appear to be functioning normally. No visible stack emissions.
Diagnosis path: First, blow out the differential pressure sensing lines and verify the gauge is reading accurately — false readings from clogged sensing lines are the most common reason this “problem” isn’t actually a problem. If the reading is confirmed accurate, check compressed air supply pressure and moisture content. Then inspect a sample of bags for blinding — if the felt surface is glazed or hardened, the dust cake has become permanent and the bags have lost permeability. This typically indicates moisture exposure, chemical interaction between the dust and the filter media, or operation at too high a temperature. For a deeper understanding of why this happens, see key protection measures for dust filter bags.
Corrective action: Address the root cause (moisture, temperature, or chemistry), adjust cleaning parameters if the system is under-cleaning, or schedule bag replacement if the blinding is irreversible.
Fault 2: Visible Stack Emissions
Symptoms: Visible dust plume or haze from the exhaust stack. May be continuous or intermittent (appearing as puffs immediately after pulse-jet cleaning cycles).
Diagnosis path: Puffs that occur only during cleaning cycles often indicate a bag that’s leaking at a point that opens under the mechanical stress of the pulse — a common pattern with seam failures or snap band bypass. Continuous emissions indicate a more significant breach: a torn bag, a failed snap band, a tube sheet gasket leak, or a structural hole in the clean-air plenum.
Corrective action: Shut down the affected compartment (if the system has compartmentalization capability) and conduct a fluorescent powder leak test to identify the specific leak location. Replace or reseat the affected bags. If the test reveals tube sheet or structural leaks, address those before returning the compartment to service. For detection methods, see how a triboelectric broken bag detector helps identify leaking filters.
Fault 3: Hopper Bridging and Overfill
Symptoms: Hopper level rises despite discharge system appearing to operate. Dust buildup visible at hopper walls or throat. In severe cases, dust backs up into the bag compartment, causing rapid bag deterioration and differential pressure spikes.
Diagnosis path: Hygroscopic dust absorbs moisture and forms cohesive masses that bridge across the hopper throat, blocking discharge. This is common in cement, calcium carbonate, soda ash, and any application where the dust has a tendency to cake when exposed to humidity. The rotary airlock or screw conveyor continues to operate, but no dust reaches it because the bridge above has created a structural blockage.
Corrective action: Clear the bridge manually (following confined space safety protocols), install hopper vibrators or air cannons if bridging is a recurring issue, and verify that the hopper is insulated or heated to prevent moisture condensation on the hopper walls. Never allow dust to accumulate above the hopper cone — the damage to filter bags from dust re-entrainment is far more expensive than the hopper maintenance that prevents it.
Fault 4: Pulse Valve Failures
Symptoms: One or more rows of bags show heavier dust cake than adjacent rows. Differential pressure in the affected compartment is higher than in others. Audible difference in pulse sound during cleaning cycles — missing or weak pulses.
Diagnosis path: Identify the non-functioning valve by observing the cleaning cycle and noting which valves don’t fire. Check the solenoid coil for power (electrical fault), check the diaphragm for wear or rupture (mechanical fault), and check the compressed air supply to that valve for blockage or pressure loss.
Corrective action: Replace the diaphragm, repair or replace the solenoid, or clear the air supply blockage. After repair, observe multiple cleaning cycles to confirm the valve is firing consistently. Bags on the affected row may need replacement if they’ve been operating without cleaning for an extended period — prolonged operation without cleaning causes permanent blinding that doesn’t recover even after cleaning is restored.
Fault 5: Rapid Bag Failures After Replacement
Symptoms: New filter bags failing within the first 3–6 months of installation, showing abrasion wear patterns, seam failures, or bottom damage.
Diagnosis path: This is almost always a cage condition, installation quality, or specification mismatch issue — not a bag quality issue. Check for cage wire corrosion and abrasion marks on the bag interior. Check for snap band seating issues. Check whether bags are the correct dimensions for the installed cages. Check whether the filter media is appropriate for the actual operating conditions (not the nameplate conditions). For a systematic analysis framework, see top 3 reasons why filter bags fail.
Corrective action: Replace damaged cages. Conduct fluorescent powder leak testing to verify installation integrity. If the failure pattern suggests material mismatch, conduct a working condition analysis to determine whether the current filter media specification is correct for the actual operating environment.
Optimizing Cleaning System Performance
The cleaning system is the most mechanically active component of a baghouse, and its performance has a direct effect on filter bag life, energy consumption, and emission stability.
Clean-on-Demand vs. Timer-Based Cleaning
Many baghouse systems ship with timer-based cleaning — the pulse-jet system fires on a fixed interval regardless of the actual dust load on the bags. This results in over-cleaning during low-load periods (which wastes compressed air and causes unnecessary mechanical stress on bags) and under-cleaning during high-load periods (which allows excessive dust cake buildup).
Clean-on-demand systems — which trigger cleaning based on differential pressure reaching an upper threshold and stop cleaning when it drops to a lower threshold — match cleaning frequency to actual need. This reduces compressed air consumption, reduces mechanical fatigue on filter bags, and maintains a more consistent differential pressure. For a detailed comparison, our article on what is clean-on-demand and why is it better than timer-based cleaning covers the engineering case and the quantified benefits.
Compressed Air Quality
The three contaminants that damage pulse-jet cleaning systems and filter bags are moisture, oil, and particulate in the compressed air supply. Moisture is the most common and the most destructive — it causes pulse valve diaphragm deterioration, filter bag blinding (when wet air contacts the dust cake and causes it to set), and corrosion of internal components.
Every pulse-jet baghouse should have an air dryer and moisture separator upstream of the pulse-jet header, with automatic condensate drainage. Monthly inspection of these components is one of the highest-return maintenance activities on the entire system.
When to Call for Professional Support
Most routine maintenance tasks can be handled by in-plant maintenance teams with appropriate training and safety procedures. Professional support becomes the better option when:
The system requires a full bag replacement on a large-count installation (500+ bags) where downtime is limited and installation quality needs verification.
Emission or differential pressure problems persist after internal troubleshooting — a working condition analysis and potentially a failure analysis of removed bags can identify root causes that aren’t visible through operational data alone.
The system needs a performance baseline reset — particularly after a process change, a fuel change, or a system modification — where the current operating parameters may no longer be optimal for the new conditions.
The baghouse needs structural renovation or system redesign to meet tightened emission requirements that the original system wasn’t designed for.
For details on our maintenance and system optimization services, visit our filtration services page or contact our engineering team directly.
Frequently Asked Questions
What is the most important maintenance task for a baghouse dust collector?
Recording differential pressure daily and tracking the trend over time. Differential pressure is the single most reliable indicator of overall system health — it reveals filter blinding, cleaning system problems, air leak issues, and increased dust loading before they become visible as emission exceedances or system failures. A daily log that starts from the day new bags are installed provides the baseline against which every future measurement is compared.
How often should I inspect my filter bags?
A quarterly sample inspection — opening one or two compartments and visually checking bags, cages, and the clean-air plenum for dust deposits — is appropriate for most applications. A full bag inspection with fluorescent powder leak testing should be conducted annually, or whenever emission measurements show an unexplained increase. Applications with strict emission compliance requirements (waste incineration, chemical processing, ultra-low emission zones) may benefit from semi-annual fluorescent powder testing.
What causes filter bag blinding and can it be reversed?
Blinding occurs when fine particles migrate into the depth of the filter felt and can’t be removed by normal cleaning cycles. The most common causes are moisture exposure (which causes the dust cake to set into the fiber structure), operation at excessively high air-to-cloth ratio (which drives particles deeper into the felt), and chemical interaction between the dust and the filter media. Mild blinding can sometimes be partially reversed by extended off-line cleaning or low-pressure compressed air back-pulsing. Severe blinding — where the felt is glazed or hardened — is irreversible and requires bag replacement.
How do I know when to replace my filter bags?
The primary indicators are: differential pressure that continues to rise despite normal cleaning and that exceeds the system’s design operating range; visible stack emissions that can’t be traced to a specific leaking bag; and physical deterioration visible during inspection (thinning fabric, abrasion holes, seam degradation, loss of surface treatment). For cement applications specifically, our article on when to replace dust filter bags in a cement plant covers the timing decision in detail.
What compressed air pressure should I use for pulse-jet cleaning?
Most standard pulse-jet systems operate at 80–100 psi (5.5–7 bar) at the header. Low-pressure pulse systems operate at 40–60 psi (2.7–4 bar). PTFE membrane filter bags typically require lower pulse pressure — 45–60 psi (3–4 bar) — to avoid membrane delamination. The correct pressure depends on your specific system design and filter media type. Excessive pulse pressure wastes compressed air and causes unnecessary mechanical stress on bags; insufficient pressure leaves residual dust cake and causes progressive blinding.
Can preventive maintenance really prevent most baghouse failures?
Yes. The majority of baghouse failures fall into predictable categories: filter blinding from moisture or over-loading, cleaning system degradation from worn diaphragms or insufficient air quality, hopper overfill from failed discharge systems, and structural leaks from corrosion or gasket deterioration. All of these present as gradual trends before they become acute failures — and all are detectable through routine monitoring and inspection. A structured preventive maintenance program that covers the daily, weekly, monthly, and annual tasks outlined in this guide prevents approximately 80–90% of the unplanned failures that cause emergency shutdowns and compliance violations.
Author
Jessica Ma – Senior Filtration Engineer, Omela Filtration
Jessica Ma is a senior filtration engineer at Omela Filtration, specializing in dust and liquid filtration. With over 15 years of experience, she focuses on optimizing baghouse performance, enhancing filtration efficiency, and developing high-performance solutions for industrial dust collectors and precision liquid filtration applications.