Key Takeaways
- Installation errors — snap bands not seated, cages reused without inspection, bags kinked during handling — are one of the top three causes of premature filter bag failure, alongside material mismatch and system design issues.
- Always inspect and verify cage condition before installing new bags. Corroded, bent, or rough-welded cage wires create internal abrasion points that destroy new bags from the inside out within months.
- Dimensional verification before ordering — measuring actual cage diameter, length, and snap band type — prevents fit issues that are expensive to correct after delivery. Nominal specifications on old drawings may not match your actual installed dimensions.
- Never fold, compress, or stand on filter bags during installation. Creases in needle-felt media create weak points that develop into holes under the mechanical stress of pulse-jet cleaning.
- Post-installation fluorescent powder leak testing is the only reliable method for verifying that every bag is properly seated and every seal is intact — visual inspection misses 60–70% of real leak paths in documented field tests.
- On systems above 500 bags, professional installation service typically pays for itself through avoided rework, reduced downtime, and verified installation quality.
Filter bag installation looks simple. You pull out the old bag, drop in the new one, seat the snap band, lower the cage, and move to the next one. On paper, it’s repetitive manual work — the kind of task that plant maintenance teams handle routinely during scheduled shutdowns.
In practice, filter bag installation is one of the most consequential maintenance activities on a baghouse system, and installation errors are one of the three most common causes of premature bag failure. Alongside material mismatch and system design issues, improper installation creates failure modes that appear within weeks or months — leaking snap bands, bag-to-cage abrasion, kinked fabric, misaligned cages — and are routinely misattributed to product quality rather than installation technique.
Getting the installation right isn’t complicated, but it does require attention to a specific sequence of steps, a few non-obvious precautions, and a verification method that confirms the work was done correctly before the system goes back into service.
This article walks through the complete process from pre-installation preparation through post-installation verification, covering both top-load and bottom-load baghouse configurations. Whether you’re doing the work with your own maintenance team or evaluating whether professional installation service is appropriate for your system, this guide covers what matters.
Before You Start: Pre-Installation Preparation
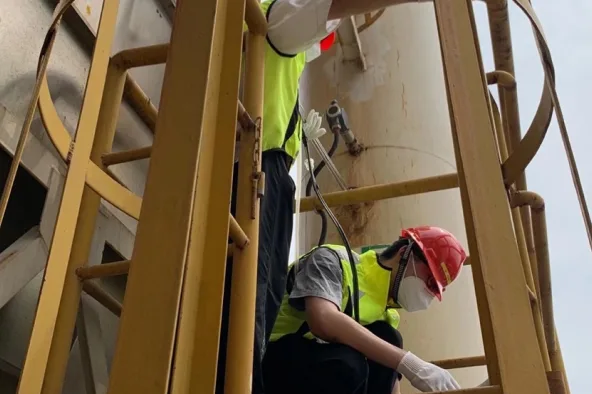
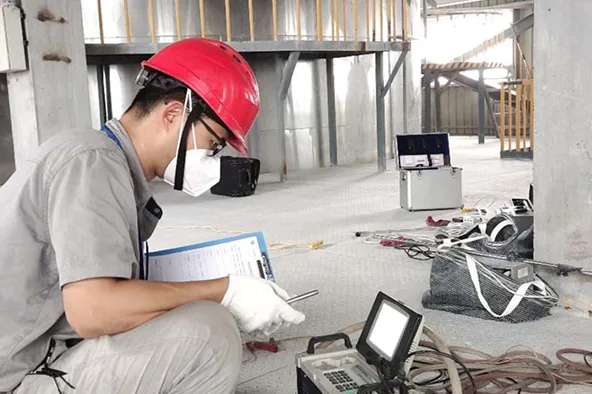
Safety First
Baghouse interiors are confined spaces in most jurisdictions. Before anyone enters the clean-air plenum or the bag compartment, confirm that:
The system is fully shut down — fan off, dampers closed, pulse-jet system depressurized. Lockout-tagout (LOTO) procedures are completed per OSHA or local equivalent requirements. A designated safety watch is posted at the entry point. All personnel wear appropriate PPE: hard hat, safety glasses, N95 or higher respiratory protection, gloves, and steel-toe boots. If the dust is combustible, atmospheric testing confirms dust concentrations are well below explosive limits before any entry. All hot work (welding, grinding) is completed and cleared before filter bag work begins.
These are not suggestions. Confined space entry fatalities in industrial dust collection systems are documented, and the safety protocols exist because the hazards are real.
Dimensional Verification
Before ordering replacement bags, verify the actual dimensions of your installed cages and tube sheet openings. This seems obvious, but it’s one of the most frequently skipped steps — and one of the most expensive to correct after the fact.
Nominal dimensions on equipment drawings or original purchase orders may not match your actual installed hardware. Cages that have been in service for years may have dimensional drift from thermal cycling. Tube sheet openings may vary between compartments due to manufacturing tolerances or field modifications.
The measurements that matter: cage diameter, cage length, snap band or collar type and diameter, and tube sheet hole diameter. For a detailed walkthrough of the measurement process, our article on how to measure dust collector filter bags and cages for a perfect fit covers the technique and the common pitfalls.
Receiving Inspection
When new filter bags arrive on site, inspect them before installation begins. Check that the bag count, dimensions, material type, and surface treatment match your purchase order. Look for shipping damage — compressed or creased bags, torn packaging that may indicate handling damage, snap bands that are bent or deformed.
Bags should be stored horizontally in their original packaging, in a dry, covered area, protected from UV exposure, until they are ready to install. Bags that have been stored improperly — left in direct sunlight, exposed to rain, or stacked under heavy loads — may have degraded fiber properties before they’re ever installed.
Step 1: Removing Old Filter Bags
Run the Cleaning System First
Before removing old bags, run the pulse-jet cleaning system through several complete cycles with the fan off. This shakes loose the residual dust cake and drops it into the hopper, reducing the dust load that the maintenance team will be working in and making bag removal cleaner and faster. Allow the hopper discharge system (rotary valve or screw conveyor) to clear the accumulated dust before entry.
Top-Load Systems
In top-load baghouse configurations — the most common design in pulse-jet systems — bags are accessed from the clean-air plenum above the tube sheet. The removal sequence:
Open the clean-air compartment access doors. Remove the pulse-jet tube assembly if it interferes with cage access. If the system uses hold-down hardware (clamps, bolts, or retaining bars), remove this hardware first. Pull the cage out of the bag vertically, straight up, without tilting or rocking. Once the cage is out, pull the bag out through the tube sheet opening, gathering it from the top.
Handle old bags with care even during removal. Pulling bags out roughly can damage tube sheet gaskets or deform snap band seats. If a bag is stuck due to dust buildup or corrosion at the snap band, work it free carefully rather than forcing it — forcing a stuck bag can damage the tube sheet opening and create a seal problem for the new bag.
Bottom-Load Systems
In bottom-load configurations — common in reverse-air and some older pulse-jet designs — bags are accessed from the dirty-air side below the tube sheet. The bag is typically attached to the tube sheet at the top by a snap band or spring collar, and the cage is inside the bag. Removal involves releasing the attachment at the top, lowering the bag and cage together, then separating them.
Bottom-load removal in large systems is more physically demanding and typically requires scaffolding or man-lifts inside the hopper section. Plan the access equipment before the shutdown begins — discovering that you need scaffolding after the system is already opened adds hours to the downtime window.
Step 2: Cage Inspection — The Step Most People Skip
This is where the most common installation mistake happens. Not in how the new bag is installed — but in what it’s installed onto.
Old cages that are reused with new bags without inspection are responsible for a significant proportion of premature bag failures. The failure mode is internal abrasion: rough cage wire surfaces, corrosion pitting, bent or broken wires, and damaged cage rings create abrasion points that wear through the filter fabric from the inside. The bag fails at predictable locations — contact points with damaged cage wires — and the damage pattern is often misread as a product quality issue rather than a cage condition issue.
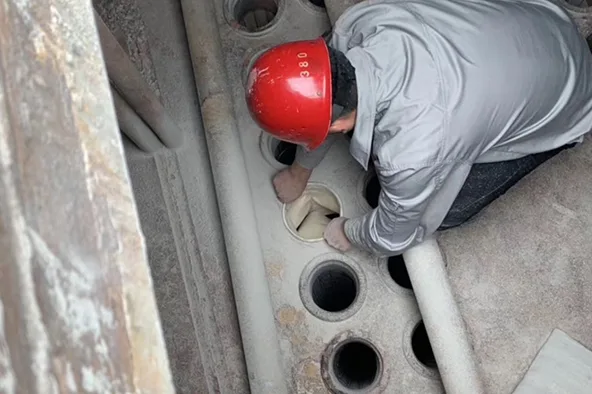
Inspect every cage before installing a new bag onto it. The checklist:
Wire condition — run your gloved hand along the cage wires. Any roughness, burrs, pitting, or sharp edges will abrade the new bag’s inner surface under the flex fatigue of pulse-jet cleaning. Smooth wire with intact galvanizing or coating is acceptable. Corroded, pitted, or rough wire is not.
Wire alignment — all vertical wires should be straight and evenly spaced. Bent or displaced wires push into the bag fabric under pulse-jet cleaning pressure, creating localized stress concentrations that lead to pinhole failures.
Ring integrity — the horizontal support rings should be round, firmly welded to the vertical wires, and free of cracks at the weld joints. Broken ring welds allow the cage to deform under pressure, which causes uneven bag loading and accelerated wear.
Venturi / top cap condition — the venturi (if equipped) should be centered, undamaged, and firmly attached. A damaged or misaligned venturi disrupts the pulse-jet cleaning air pattern, reducing cleaning effectiveness.
Overall straightness — sight down the cage length. A cage that is bowed, twisted, or visibly out of alignment will create bag-to-cage contact that produces abrasion wear along the length of the distortion.
Cages that fail any of these checks should be replaced, not reused. The cost of a new cage is a fraction of the cost of a premature bag failure — and the replacement bag, and the labor to install it, and the system downtime. For more on cage options, see our range of filter bag cages including galvanized steel, stainless steel, and silicone-coated options for corrosive environments.
Step 3: Installing New Filter Bags
Handling Precautions
Before installing, there are a few handling rules that are easy to overlook but significant in their effect on bag performance:
Never fold or crease the bag. Creases in needle-felt filter media create permanent weak points in the fiber structure. Under the repeated mechanical stress of pulse-jet cleaning, these weak points develop into holes — typically within the first few months of service. Keep bags in their original packaging until you’re ready to install each one.
Never stand on bags or use them as padding. This happens more often than you’d expect on large-scale replacement projects where bags are laid out on the tube sheet for access. Any compression damage to the fabric compromises filtration integrity.
Never drag bags across the tube sheet or cage surfaces. This abrades the filter surface and can damage surface treatments (PTFE membrane, singeing, calendering) that are critical to filtration efficiency and dust release performance.
Wear clean gloves. Oil, grease, and chemical contamination from hands or dirty gloves can create localized hydrophobic or hydrophilic spots on the filter surface that affect dust cake formation and cleaning uniformity.
Top-Load Installation Sequence
For top-load pulse-jet systems, the installation sequence is:
1. Insert the bag through the tube sheet opening. Lower the bag straight down through the tube sheet hole, with the snap band at the top. Let the bag hang freely — don’t bunch or compress it.
2. Seat the snap band. The snap band (or spring collar) must engage fully into the tube sheet opening groove. Press the snap band inward to compress it, guide it through the tube sheet hole, then release it so it springs outward into the seating groove. Confirm that the snap band is fully expanded and seated uniformly around the entire circumference. An incompletely seated snap band — even a few centimeters of arc that didn’t fully engage — creates a bypass path that will leak particulate into the clean-air side.
This is the single most common installation defect, and it’s the hardest to catch by visual inspection because the bag appears correctly installed when viewed from above. The only reliable way to verify complete snap band seating across an entire bag set is fluorescent powder leak testing after installation.
3. Insert the cage into the bag. Lower the cage straight down into the bag, guiding it carefully so the cage bottom doesn’t snag or puncture the bag fabric. Push the cage down until it seats fully — the cage bottom should be resting at the bottom of the bag without stretching or compressing the fabric.
4. Install the venturi (if applicable). Place the venturi on top of the cage, centered in the tube sheet opening. Confirm that it sits flat and doesn’t tilt.
5. Reinstall hold-down hardware (if applicable). Some systems use clamps, bolts, or retaining bars to secure the cage and venturi assembly. Reinstall these per the system’s original configuration.
Bottom-Load Installation Sequence
For bottom-load systems, the cage is inserted into the bag outside the baghouse, and the bag-cage assembly is then lifted into position and attached to the tube sheet from below. The snap band or spring collar is pushed up through the tube sheet opening and released to seat in the groove. This requires careful coordination — one person supporting the bag-cage assembly from below while another confirms snap band seating from the clean-air side above.
Step 4: Tube Sheet and Gasket Inspection
While the bags and cages are out, the tube sheet is accessible for inspection — and this is the only time you’ll be able to see it clearly until the next bag changeout.
Check tube sheet openings for corrosion, warping, or damage at the snap band seat. If the seating groove is corroded, pitted, or deformed, the new bag’s snap band may not seat properly regardless of how carefully it’s installed.
Check gaskets at tube sheet joints, compartment access doors, and hopper connections. Degraded gaskets create structural leak paths that contribute to emissions but are not related to any individual filter bag — and are impossible to diagnose without removing bags.
Any tube sheet or gasket issues identified during this window should be addressed before new bags are installed. Identifying them after the bags are in means opening the system again.
Step 5: Post-Installation Verification
Fluorescent Powder Leak Testing
Once all bags are installed and the system is reassembled, the final step before returning to service is verification. Fluorescent powder leak testing is the only method that reliably confirms every bag is properly seated and every seal is intact.
In documented field projects, visual inspection alone catches roughly 30–40% of actual leak paths — snap band bypasses, micro-seam defects, gasket leaks, and tube sheet issues are effectively invisible to the eye but immediately apparent under UV light after fluorescent tracer powder has been distributed through the system.
The test takes 2–4 hours for a typical 500–2,000 bag system and requires only 2–3 people. The cost is a fraction of the cost of a single regulatory emission exceedance or an emergency bag replacement caused by a leak discovered weeks later during normal operation. For more on how leak testing works and when it should be done, see our article on the benefits of leak testing for dust collection systems.
Lime Pre-Coating (When Applicable)
For some applications — particularly cement, steel, and applications with sticky or adhesive dust — lime pre-coating is applied to new filter bags before the system is returned to full dust-loading operation. The pre-coat builds an initial dust cake layer on the clean bag surface, which serves as a protective barrier during the critical first hours of operation when the bag is most vulnerable to particle penetration and adhesion.
Pre-coating is not required for all applications, but when it is appropriate, it should be done after leak testing and before the system is returned to process airflow.
Common Installation Mistakes and How to Avoid Them
Based on our field service experience across cement plants, power stations, steel mills, waste incinerators, and chemical processing facilities, these are the mistakes that cause the most problems:
Reusing damaged cages without inspection. This is the number one cause of post-installation bag failure that gets blamed on bag quality. A five-minute visual and tactile cage inspection prevents months of reduced performance. Corroded or rough cage wires will abrade new bags from the inside, regardless of how carefully the bags were installed.
Incomplete snap band seating. A snap band that’s 90% seated looks fully seated from above. The 10% that didn’t engage creates a bypass path that leaks particulate into the clean-air plenum. Fluorescent powder testing catches this instantly.
Forcing bags into undersized tube sheet openings. If the bag doesn’t fit smoothly through the tube sheet hole, stop. Verify dimensions. Forcing a bag through a tight opening damages the fabric at the tube sheet interface — exactly where the seal needs to be perfect.
Mixing bag sizes or types within a compartment. Every bag in a compartment should be the same specification — same material, same dimensions, same weight. Mixing different bag types produces uneven airflow distribution, uneven cleaning, and accelerated failure of the lighter or thinner bags. For a broader look at what drives bag life, see top 5 factors influencing the service life of dust filter bags.
Skipping post-installation leak testing. Every installation has a defect rate — even installations done by experienced teams. The question is whether those defects are found and corrected before the system goes back into service, or discovered months later through emission exceedances and premature bag failures.
When to Use Professional Installation Service
Plant maintenance teams with baghouse experience can handle filter bag replacement effectively on most systems, particularly smaller baghouses with straightforward access and standard configurations.
Professional installation service typically becomes the better option when:
The bag count exceeds 500 and the system has tight shutdown windows — professional crews work faster because they do this every day, and the time savings on a large system can be significant enough to justify the service cost.
The system uses specialty materials (PTFE, P84, fiberglass) where handling precautions are more critical — PTFE membrane bags in particular require careful handling to avoid membrane damage.
The application has strict emission compliance requirements where post-installation verification (fluorescent powder leak testing) is needed — combining installation and verification into a single service scope ensures accountability for the result.
The plant’s maintenance team hasn’t done a baghouse bag replacement before — the first replacement on an unfamiliar system is where the highest error rates occur. Having experienced oversight for the first project builds capability for future replacements.
For details on our installation and commissioning services, visit our filtration services page or contact our engineering team to discuss your specific system.
Frequently Asked Questions
How often should filter bags be replaced in a baghouse dust collector?
Replacement frequency depends on the filter material, operating conditions, and gas chemistry. Well-specified bags in normal operating conditions typically last 2 to 4 years. Some applications — particularly those with mild dust chemistry and moderate temperatures — can achieve 4 to 6 years. Applications with aggressive chemistry (high acid content, high temperature, abrasive dust) may require replacement every 1 to 2 years. The key indicator for replacement timing is a sustained increase in differential pressure that doesn’t recover after cleaning, combined with any increase in outlet opacity or particulate concentration. For cement-specific guidance, our article on when to replace dust filter bags in a cement plant covers the decision criteria.
Can I reuse old filter bag cages with new bags?
Yes — if the cages pass inspection. Check every cage for wire condition (corrosion, pitting, roughness), wire alignment (bent or displaced wires), ring integrity (cracked welds), and overall straightness. Cages that pass all checks can be safely reused. Cages with any corrosion pitting, rough surfaces, or structural deformation should be replaced — the cost of a new cage is far less than the cost of the premature bag failure it will cause. In corrosive environments, consider upgrading to stainless steel or silicone-coated cages.
What is the most common cause of filter bag failure after installation?
Incomplete snap band seating. It’s the most frequent installation defect, and it’s almost never caught by visual inspection because the bag appears correctly installed when viewed from above. The resulting bypass leak contributes to elevated emissions without triggering any differential pressure alarm. Fluorescent powder leak testing after installation is the only reliable method for detecting this defect across an entire bag set.
Should I do fluorescent powder leak testing after every bag replacement?
Yes. Every installation has some defect rate — even installations done by experienced crews on familiar systems. A 2–4 hour fluorescent powder test costs a fraction of what a single emission exceedance or emergency bag replacement costs, and it provides documented verification that the installation is correct before the system goes back into service. It’s particularly important for systems with strict emission compliance requirements, systems with large bag counts (where the probability of at least one installation defect increases with volume), and systems using specialty filter materials.
What is the difference between top-load and bottom-load baghouse installation?
Top-load systems are accessed from the clean-air plenum above the tube sheet — the bag is lowered down through the tube sheet opening, the snap band is seated, and then the cage is lowered into the bag from above. Bottom-load systems are accessed from the dirty-air side below — the bag and cage are assembled together and lifted up into the tube sheet opening from below. Top-load is more common in modern pulse-jet systems and is generally faster and easier for replacement work. Bottom-load is found in reverse-air and some older pulse-jet designs and typically requires scaffolding or man-lift access inside the hopper section.
How do I know what size filter bag to order for my system?
Measure the actual installed cage dimensions — diameter, length, and snap band or collar type — rather than relying on equipment drawings or previous purchase orders. Nominal specifications may not match your actual hardware due to manufacturing tolerances, field modifications, or dimensional drift from thermal cycling over years of service. Our article on how to measure dust collector filter bags and cages for a perfect fit walks through the measurement process step by step.
Author
Jessica Ma – Senior Filtration Engineer, Omela Filtration
Jessica Ma is a senior filtration engineer at Omela Filtration, specializing in dust and liquid filtration. With over 15 years of experience, she focuses on optimizing baghouse performance, enhancing filtration efficiency, and developing high-performance solutions for industrial dust collectors and precision liquid filtration applications.