
Key Takeaways
- Accurate measurement is essential before ordering replacement dust collector filter bags, because errors in diameter, length, top style, snap band, or bottom design can cause leakage, bypass, difficult installation, abrasion, and short service life.
- Filter bag size should be checked together with filter bag cages, because cage diameter, cage length, wire condition, coating quality, and cage-to-bag clearance directly affect bag wear and cleaning performance.
- For a pulse jet baghouse dust collector, the bag must match the tubesheet hole, snap band, cage, venturi, cleaning method, and airflow design, not only the nominal diameter and length.
- If old bags failed early, photos of the bag, cage, tubesheet, dust pattern, and failure location can help Omela identify whether the issue is wrong sizing, poor sealing, cage abrasion, high pressure drop, chemical attack, or incorrect cleaning.
- To confirm replacement filter bags faster, send your bag size, top and bottom design, snap band details, cage dimensions, operating conditions, quantity, and photos to contact Omela Filtration.
Why Accurate Filter Bag Measurement Matters
A dust collector filter bag must fit the baghouse as a complete assembly. The bag body must match the cage. The snap band or top style must match the tubesheet. The bottom design must provide enough clearance for the cage and hopper area. The filter media must also match the dust type, temperature, chemical condition, and cleaning method.
Many replacement mistakes happen when a buyer only provides “diameter × length.” In practice, two filter bags with the same diameter and length can still have different top styles, bottom designs, snap band structures, sewing methods, and cage requirements. If one of these details is wrong, the bag may leak around the tubesheet, rub against the cage, fold near the bottom, or fail earlier than expected.
Several filter bag measuring guides recommend measuring flat width, length along the seam, snap band details, and bag-to-cage fit instead of relying only on old drawings or purchase records. For top-load snap band bags, length is commonly measured from the snap band area along the seam to the first stitch at the bottom of the bag.
Before Measuring: Confirm the Baghouse and Bag Type
Before taking dimensions, first identify how the filter bag is installed. A top-load pulse-jet baghouse usually uses snap band bags installed through the tubesheet from the clean-air side, with cages inserted from the top. A bottom-load system may use cuffs, collars, rings, clamps, or other attachment methods. Shaker and reverse-air systems may use loop tops, straps, grommets, caps, or special bottom attachments.
This first step matters because the measurement reference points are different for different bag types. A snap band bag, a ring-top bag, a flange-top bag, and a shaker bag should not be measured in exactly the same way. The top style controls sealing, while the bottom design controls support, clearance, and wear behavior.
How to Measure Bag Diameter or Flat Width
For a round dust collector filter bag, the safest starting point is usually the flat width. Lay the used bag on a clean, flat surface, smooth the fabric gently, and measure across the bag body from one side to the other. Do not stretch the fabric too hard, because old filter bags may have already shrunk, hardened, or deformed during operation.
The finished diameter can be estimated from the flat width using this simple relationship:
Diameter ≈ Flat Width × 2 ÷ 3.1416
For example, if the flat width is about 238 mm, the estimated diameter is about 151.5 mm, so the replacement bag may be treated as a 152 mm diameter filter bag. However, the flat width should not be used alone. It is better to confirm the cage outside diameter and tubesheet hole diameter as well, especially when the old bag is distorted or damaged.
How to Measure Filter Bag Length
For many top-load snap band filter bags, measure along the longitudinal seam from the snap band reference point to the first stitch at the bottom of the bag. This keeps the measurement consistent and avoids errors caused by fabric distortion. Some measuring instructions recommend starting from the center of the snap band, while others specify the top of the bag or the sealing reference point; the important point is to clearly tell the supplier which reference points were used.
The bag should be straight, but not overstretched. If the filter bag has a tail, loop, strap, or special bottom attachment, measure the main bag body separately from the attachment. Otherwise, the replacement bag may be too long or too short in the actual baghouse.
A bag that is too short may pull at the top and stress the snap band or seam. A bag that is too long may fold at the bottom, rub the hopper area, or allow the cage to push into the bottom disc. Recent replacement-bag guides also emphasize that total length and useful hanging length are not always the same, especially for snap band, flange, cuff, or special top styles.
How to Identify the Top Style
The top style is the sealing and installation interface of the filter bag. It should be photographed clearly and described accurately. A “ring top” and a “snap band top” are not the same. A flange, cuff, collar, raw edge, loop, grommet, or cap-and-strap design also requires different construction.
For snap band bags, the snap band must seat tightly into the tubesheet hole. If the snap band is too small, dust can bypass the bag. If it is too large, installation becomes difficult and the band may not seat correctly. The tubesheet hole diameter, tubesheet thickness, snap band height, felt cuff height, and single-bead or double-bead structure should be confirmed when possible.
Photos are very important here. A close photo of the bag top from the outside and inside can usually prevent mistakes in the top construction.
How to Measure the Tubesheet Hole
The tubesheet hole determines whether the filter bag top can seal correctly. Use a caliper or inside measuring tool to measure the hole diameter. Measure several holes if possible, because old baghouses may have worn, corroded, or deformed tubesheet holes.
Do not assume that the tubesheet hole equals the bag diameter. The tubesheet hole, snap band size, bag diameter, and cage diameter are related, but they are not identical. Some top-load baghouse guides list different combinations of tubesheet hole size, bag diameter, and cage diameter, which means there is no single universal size for all systems.
If the tubesheet is worn or out of round, even a correctly made bag may leak. In this case, the customer should send photos of the tubesheet and clean-air side dust pattern.
How to Confirm the Bottom Design
The bottom design affects cage clearance, dust impact, abrasion resistance, and service life. A common pulse-jet filter bag may use a closed disc bottom with reinforcement. Other systems may use an open bottom, hemmed bottom, wear cuff, double-layer bottom, loop bottom, tail bottom, or special cap bottom.
The bottom should be checked for wear marks, punctures, hardening, seam damage, and cage contact. If the cage is too long, it may press into the bottom disc. If the bag is too long, the bottom may fold or rub. If the inlet airflow is poorly distributed, abrasive dust may attack the lower bag area and create holes.
For replacement, the supplier should know whether the bottom is a simple sewn disc, a reinforced disc, a double-layer bottom, or a special attachment style. Bottom photos are often more useful than a written description alone.
How to Check Cage Fit
The filter cage supports the bag and keeps it open during filtration and cleaning. If the cage is too tight, it can stretch the bag and create abrasion marks. If it is too loose, the bag may move too much during pulse cleaning. If it is too long, it can push against the bag bottom. If it is rusty, bent, or rough, it can damage a new bag quickly.
Bag-to-cage fit guidance varies by supplier and bag construction. Some measuring guides mention a small pinch or clearance between the bag and cage, while also warning that the bag should not be stretched tightly around the cage. The practical goal is simple: the cage should support the bag smoothly without forcing, rubbing, or puncturing it.
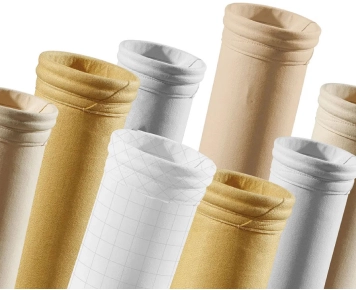
When replacing filter bags, inspect the cage outside diameter, total length, vertical wires, wire diameter, ring spacing, venturi, top flange, bottom cap, joint structure, surface coating, welds, corrosion, and straightness. Reusing damaged cages is one of the most common reasons new bags fail early.
Measurement Checklist for Replacement Filter Bags
- Bag flat width and estimated diameter
- Overall bag length and measurement reference points
- Top style, snap band details, tubesheet hole diameter, and tubesheet thickness
- Bottom design, reinforcement height, bottom disc condition, and cage bottom clearance
- Cage diameter, cage length, wire count, ring spacing, venturi style, cage material, and cage surface condition
- Filter media, surface treatment, operating temperature, dust type, cleaning method, and quantity
- Photos of the bag top, bag bottom, cage, tubesheet, clean-air side, and failure area
Common Measurement Mistakes to Avoid
- Confusing flat width with diameter, which can lead to a completely wrong bag size
- Measuring only the old bag without checking the cage and tubesheet, even though old bags may shrink, stretch, or deform
- Describing the top style too generally, such as writing only “ring” when the bag actually uses a snap band, flange, cuff, or collar
- Ignoring the bottom design and cage bottom clearance, which can cause folding, rubbing, or bottom puncture
- Reusing bent, rusty, rough, or incorrectly sized cages with new replacement bags
- Sending no photos, especially when the filter bag has a special top, reinforced bottom, tail, loop, or custom connection
Why Photos and Failure Details Matter
Measurements tell the supplier the size, but photos tell the supplier the construction and failure mode. A bag with dust leakage near the top may have a sealing issue. A bag with vertical cage marks may have cage abrasion. A bag with bottom holes may have cage length, airflow impact, or hopper turbulence problems. A hardened or brittle bag may suggest heat or chemical attack.
EPA explains that dust builds up on fabric filters and increases pressure drop, so the filter material must be cleaned periodically; common cleaning methods include shaking, reverse air, and reverse pulse or pulse jet. This means replacement filter bag performance is not only about the physical size. Cleaning method, pressure drop, dust cake behavior, and operating conditions also affect service life.
For this reason, a good replacement inquiry should include both dimensions and operating information. If the previous filter bags failed early, failure photos are often as valuable as the measurement data.
To Request a Quote
For dust collector filter bag replacement, please send:
- Application or industry, dust type, working temperature, peak temperature, and cleaning method
- Bag flat width or diameter, overall length, top style, bottom design, snap band or ring details
- Tubesheet hole diameter, tubesheet thickness, cage diameter, cage length, and cage photos
- Current filter media, surface treatment, current service life, and main failure problem
- Quantity, delivery destination, and photos of the current bag, cage, tubesheet, and failure area
Omela Engineering View
A replacement dust collector filter bag should not be quoted by diameter and length alone. The correct design depends on the complete assembly: bag body, top style, snap band, tubesheet hole, bottom design, cage diameter, cage length, venturi, filter media, cleaning method, and operating conditions.
The most reliable approach is to measure the used bag, measure the cage, check the tubesheet, take photos, and record the failure mode. This helps avoid repeated failures caused by wrong dimensions, poor sealing, cage abrasion, high pressure drop, or unsuitable filter media.
Omela Filtration helps customers customize dust collector filter bags, match filter bag cages, review baghouse failure problems, and provide replacement recommendations based on real working conditions.
FAQ
How do I measure the diameter of a dust collector filter bag?
Lay the bag flat, smooth out wrinkles, and measure the flat width across the bag body. For a round bag, the estimated diameter is flat width × 2 ÷ 3.1416. If the old bag is deformed, also measure the cage diameter and tubesheet hole.
How do I measure the length of a snap band filter bag?
For many top-load snap band bags, measure along the seam from the snap band reference point to the first stitch at the bottom of the bag. Keep the bag straight but avoid overstretching old fabric.
Why is the top style important when ordering replacement filter bags?
The top style controls sealing and installation. A snap band, ring top, flange, cuff, collar, loop, or grommet top may require different construction. If the top style does not match the tubesheet or mounting system, the bag may leak or become difficult to install.
Why should I measure both the filter bag and the cage?
Old filter bags may shrink, stretch, or deform after service. The cage and tubesheet provide important reference dimensions for the replacement bag. Cage fit also affects bag support, cleaning performance, abrasion, and service life.
What information is needed for a replacement filter bag quote?
Provide bag flat width or diameter, overall length, top style, bottom design, snap band details, tubesheet hole size, cage diameter and length, filter media, operating temperature, dust type, cleaning method, quantity, and photos.
Why do photos help when replacing dust collector filter bags?
Photos help confirm top style, bottom design, cage condition, tubesheet condition, and failure mode. They reduce the risk of wrong construction and help identify whether early failure was caused by sizing, sealing, abrasion, temperature, chemistry, or cleaning problems.
Author

Jessica Ma – Senior Filtration Engineer, Omela Filtration
Jessica Ma is a senior filtration engineer at Omela Filtration, specializing in dust and liquid filtration. With over 15 years of experience, she focuses on optimizing baghouse performance, enhancing filtration efficiency, and developing high-performance solutions for industrial dust collectors and precision liquid filtration applications.